The Secret of Pizza Dough Hydration: Finding Your Perfect Balance
For many home pizzaiolos, the journey toward the perfect pie begins with the toppings. But as any seasoned baker at PizzaCream will tell you, the true soul of a pizza lies in its foundation: the dough. While flour type and fermentation time are vital, there is one technical variable that dictates the final character of your crust more than any other—hydration. Understanding hydration is the difference between a dense, cracker-like base and a light, airy, artisan-style crust.
What is Pizza Dough Hydration?
In the world of professional baking, we don’t measure ingredients solely by volume or weight in isolation. Instead, we use “Baker’s Percentages.” Hydration refers to the weight of the water relative to the weight of the flour in a recipe. It is the most critical ratio in your formula.
The calculation is simple: (Weight of Water ÷ Weight of Flour) x 100 = Hydration Percentage.
For example, if your recipe calls for 1,000 grams of flour and 650 grams of water, you are working with a 65% hydration dough. Even a small 5% shift in this number can radically transform how the dough feels in your hands and how it behaves in the oven. Mastering this ratio is a fundamental step in The Art of the Perfect Crust: A Deep Dive into Artisan Pizza Making.
Why Hydration Matters for Crust Texture
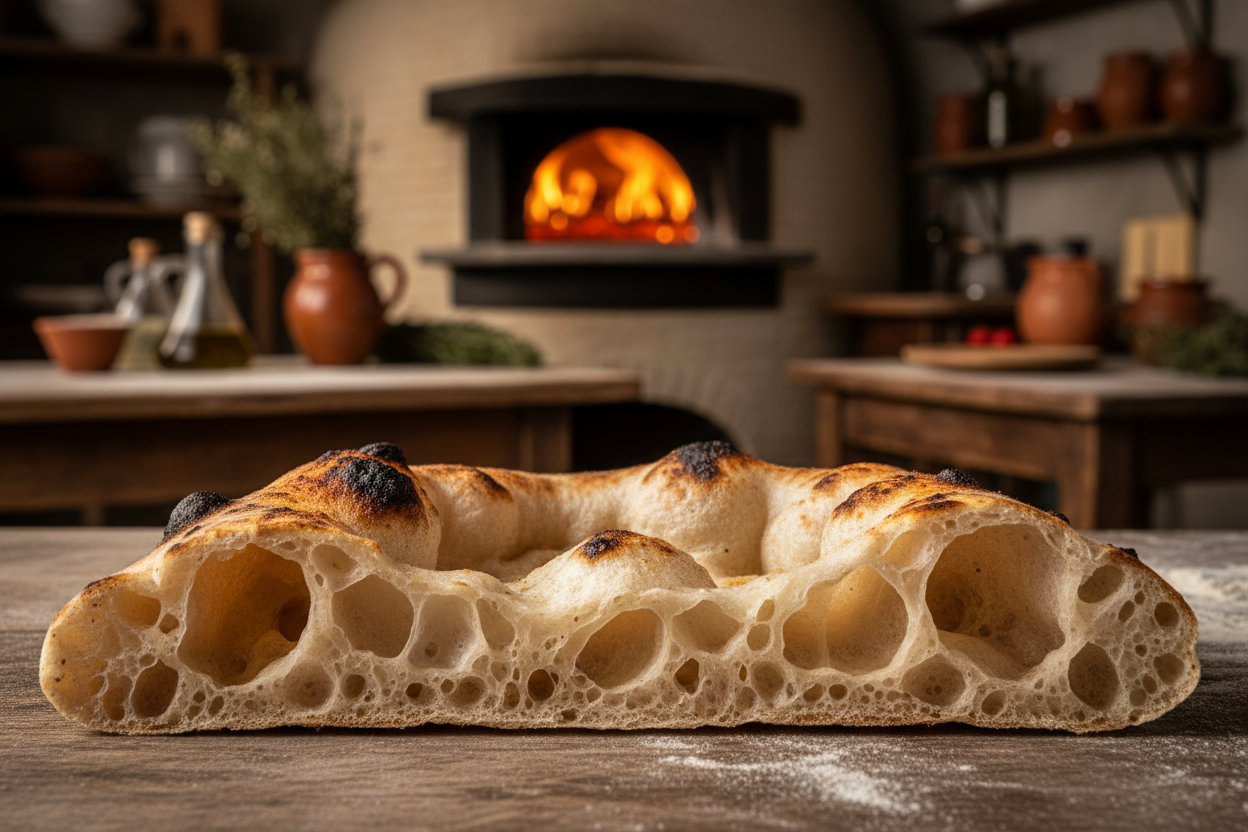
Hydration is the primary driver of the “crumb” (the internal structure of the crust). When dough is placed in a hot oven, the water inside turns into steam. This steam expands, inflating the gluten network and creating those beautiful air pockets, known as alveoli.
Generally, more water leads to a more open, airy, and chewy interior. Conversely, less water results in a tighter crumb that is easier to get crispy and rigid. The “perfect” balance depends entirely on the style of pizza you want to achieve. If you want a crust that can support a mountain of toppings without sagging, you might lean toward lower hydration. If you want a cloud-like Neapolitan rim with “leopard spotting,” high hydration is your best friend.
Comparing Low vs. High Hydration
Low Hydration (50% – 60%): This range is common for New York-style pizzas or thin-and-crispy “cracker” crusts. At 50-55%, the dough is stiff, easy to knead by hand, and very simple to shape with a rolling pin or by hand-stretching. The result is a sturdy, crunchy crust with a dense, uniform crumb. It is the most beginner-friendly range because the dough is not sticky.
Medium Hydration (60% – 65%): This is the “sweet spot” for many home bakers. It offers a balance of ease of handling and a respectable rise. It’s versatile enough for almost any home oven setup.
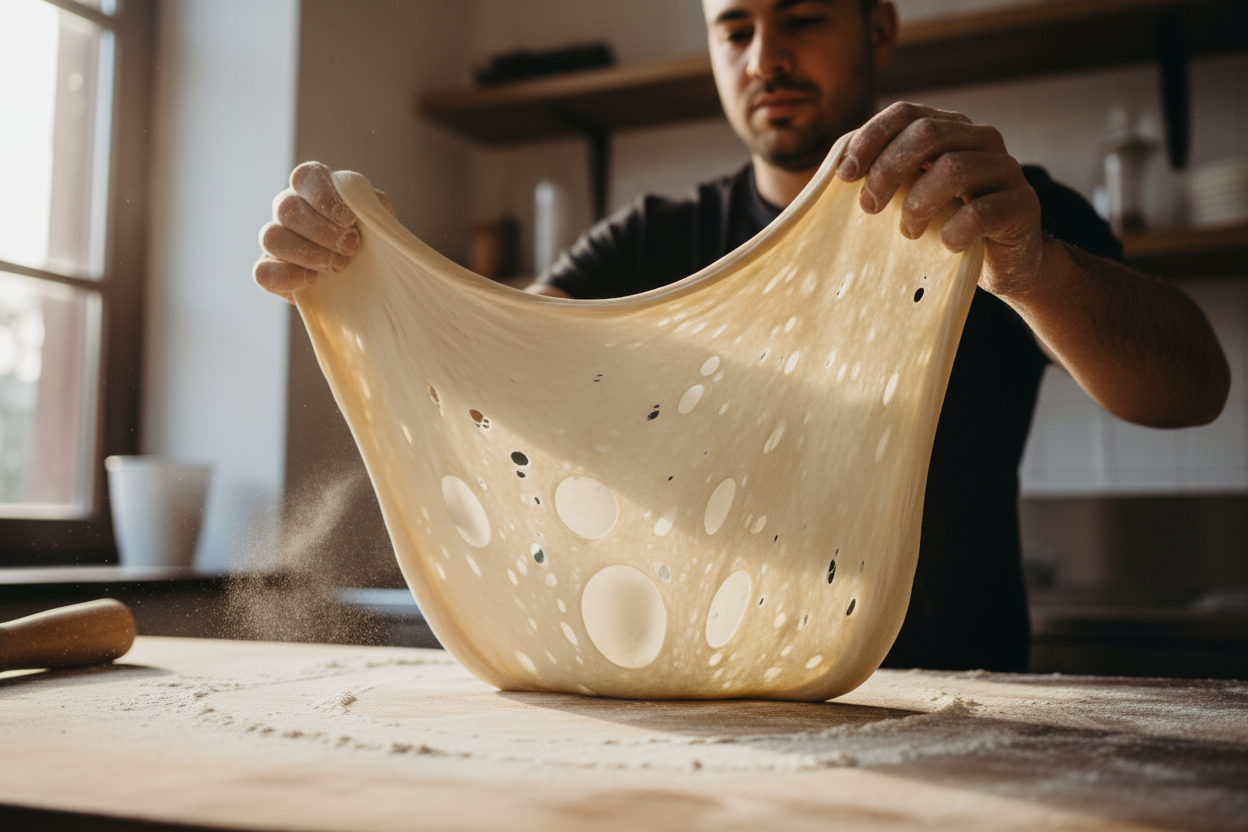
High Hydration (65% – 80%+): This is the realm of artisan sourdough pizzas and Ciabatta-style crusts. High hydration doughs are soft, extensible, and produce a dramatic “oven spring.” The high water content allows the dough to stay moist even at the extreme temperatures of a wood-fired oven, resulting in a crust that is crispy on the very outside but incredibly soft and chewy on the inside.
Tips for Handling Sticky, High-Hydration Dough
The biggest challenge with high-hydration dough is its stickiness. It can feel more like a thick batter than a dough, which often leads beginners to add too much extra flour, inadvertently lowering the hydration. Here is how to handle it like a pro:
- The Autolyse Method: Mix your flour and water and let them sit for 30–60 minutes before adding salt or yeast. This allows the flour to fully hydrate and gluten to begin forming naturally, making the dough less sticky.
- Wet Your Hands: Instead of flouring your hands, dip them in water. High-hydration dough won’t stick to wet skin, allowing you to perform “stretch and folds” easily.
- Use a Bench Scraper: A metal or plastic bench scraper is essential for moving and dividing wet dough without tearing the gluten structure.
- Cold Fermentation: Let your dough rise in the refrigerator. Cold dough is significantly firmer and easier to handle than room-temperature dough.
How Baking Tools Affect the Outcome
Your choice of hydration should also be influenced by your equipment. High-hydration doughs require intense, rapid heat to turn that extra water into steam before the dough dries out. If you are using a standard home oven that only reaches 500°F (260°C), a very high hydration dough (like 75%) might end up gummy if not baked correctly.
This is where your baking surface becomes critical. A pizza stone provides a porous surface that helps wick away some moisture from the bottom of the dough, aiding in crispiness. However, a pizza steel conducts heat much faster than stone, providing the massive thermal “kick” needed to puff up high-hydration crusts in a home environment. To decide which tool fits your hydration preference, check out our guide on Pizza Stones vs. Pizza Steels: Which One is Best for Your Home Kitchen?
Conclusion
There is no single “correct” hydration level, only the one that produces the pizza you love. We recommend starting at 60% and increasing the water by 2% each time you bake. By experimenting with these ratios, you’ll eventually find your perfect balance—the secret to a PizzaCream-quality crust in your own kitchen.